Monday, August 31, 2009

Pattern and Colour

I have discovered over the years that I simply love pattern and colour. I love scrapbooking paper with all the patterns and different materials. I'm particularly fond of geometric shapes and muted colours.

You can imagine what I thought when I saw all the wonderful materials used by Melanie of Bags by Melanie. Melanie sews beautifully. Her work is simple yet eye catching. My aunt makes bags and is always looking for great material. She'd also love Melanie's taste.

Here are a couple of items she has for sale in her etsy shop.


Monday, August 24, 2009

Happy Childhoods and Inspiration for Creation

I ducked over to Rae Anne's blog today. She has a blog that is so fun to read. She is raising two kids who she's obviously adores buckets and the grins on the kids speak volumes. I loved the caption on this picture. It reminded me of the care free days out I used to have with family and friends. None of all that health and safety stuff that becomes so exhausting now-a-days. Just days in the sun with family doing fun things. She writes....


"Grandma is holding the chair so that Q doesn't fall off the slope. We are all about the safety. Not pictured? Open flames. And sharp sticks holding lots of ill-refrigerated processed meat. Parents of the year."
LOL

Full of pictures, this one caught my attention.

When I finally make it into my new house (could be as little as a month now) I want to get out mum's old slides of the orchard (before it became a nursery) and also of some of her travels to see if I can make them into beaded scenes. If I had a picture like this I'd be looking at bead colours immediately.

Wednesday, August 12, 2009

Experimentation

I have all these buttons at home. Some are from old sewing projects, some I bought simply because I liked the look of them. I want to make things with them but am often at a loss as to what to do. I make things and then just don't like them. Here is a ring that I made recently that is not too bad. It will need to be worn by an arty person being large and purple and orange (the colours I always associate with art teachers from school). So, tell me what you think.

Sunday, July 19, 2009

The Importance of Little Things

Every now and then I remember to take some time out. After a tough couple of weeks I sat down on the porch in the sun with a cup of tea. As afternoon gradually became twilight I watched a couple of Kookaburras on the lawn in front of me having their dinner. As the shadows lengthened these two beautiful birds would sit in the tree branches waiting and then land on the ground and kill whatever it was they found. All was peaceful and quiet. I could hear their wings flap and their beaks snap. I brought me to a place of calm.

It's been ages since I've seen Kookaburras at home. When I was growing up they used to sit on the washing line and we'd see them almost every day, especially as mum would put out the scraps of meat from cooking dinner.

It really is the small things that make life worthwhile. Mum used to love the colours of the rain on the trees as the sun glittered through. She would have loved to sit and watch these two birds with me. And I thought of other small things that make life that much better. My friend Nifty spending ages finding just the right eyebrows for my mini-me on her Wii last night.

And then there are the beautiful illustrations and artworks of Gretchen of Chichiboulie. Earlier today, the childish fun and simplicity of her drawings made me smile. How can you not smile when faced with this?


Or this?

There is so much joy to be had on Gretchen's blog and in her shop. I can tell you, you'll enjoy the time you spend.

Thursday, July 16, 2009

Using my Kumihimo

A couple of posts ago I showed some of the necklaces that I'd managed to incorporate my braids into. I have also made a couple of bracelets. The first one is incredibly simple but then the braid itself is so pretty it didn't warrant any other detail really. It was with this one that I made the coil that makes for a very simple end that makes the braid very usable and also keeps the attention on the braid rather than the link.


The second braid is not quite so successful. I love the look of it but the wire at the side needs a little adjusting as the plait comes out of it. I love the effect of the button but it is a little heavy for the braid. Looks great though. I also love my picture as, after lots of fussing I finally managed to make it look great and uncluttered.


I really must put more time into the photos so I can get myself some sort of portfolio to show people. That is for another day though.

Sunday, July 12, 2009

Wonderful packaging ideas...

Packaging and presentation of your work to buyers is always important but not always thought through. Susy from Earth Expressions has given some very simple and practical ideas on her blog. You can read her suggestions here. Susy makes a whole range of things. Lots of paper is used, vintage findings and wire. Her work ranges from bookmarks to pendants and earring and decorating other objects. I especially love her simple tins. Susy presents her pendants and pendant necklaces in these.


Monday, June 29, 2009

Full Family Life

Amanda has a busy family life. She keeps a blog with pictures and stories at Confessions From HouseholdSix. I have to say that reading it reinforces my love of life with only the kids I teach and can hand back with lots of time to myself. Amanda obviously loves her family though and lets us laugh and groan with her day to day life. Somehow she also finds time for a little bit of crafting and I really like this computer scrapping she did and made into a tumbler.


Monday, June 22, 2009

For Friends

I was having dinner with some friends of mine a few weeks ago. One of them asked about my jewellery and how it was going and I ended up with a couple of requests. One friend, Meryl, asked me to string some pearls. "Of course", I said, so I've taught myself to string pearls. I had fun. I bought all the proper silks with the needles attached and made use of my embroidery knotting skills. I started three times and it's not a professional job to my inquisitive eyes, but I'm quite pleased with myself.

The request from my other friend, Aline, was even more fun. She had a necklace of her mother's that was too heavy to wear but that was Venetian Glass Beads from her trip to Venice. Was their anything I could do? Here is what the necklace was originally.


So we decided to make a series of necklaces for her daughters and granddaughters. Eight in total. It took me a while to get going which isn't unusual, but I love what the results were. I made each necklace a different colour and mostly different styles. Because there were nineteen beads and I had to divide them into eight, some necklace have three of the original beads while others have only two.

Lavender
On gold tone fine chain with Swarovski crystals.


Burgandy
Red tigertail with fresh water pearls and Swarovski Crystals.


Blue
Silver tigertail with Swarovski Crystals. Pendant is a chinese cube from a pattern by Valerie Hector. Smaller beaded beads are made using Right Angle Weave.


Teal
Fresh water pearls with Swarovski Crystals and silver tone chain. Pendant is a chinese cube from a pattern by Valerie Hector.


Purple Velvet
Silver tone chain with Swarovski Crystals.

In the next three designs I even incorporated some of my Kumihimo braids. I am so pleased that I can find different ways to incorporate them.

Mint
Kumihimo braid with delica beads and Swarovski Crystals. Beaded beads are made using Right Angle Weave. Can be worn assymetrically or symmetrically.


Amethyst
Kumihimo braid using tigertail, hand made gold tone clasp and Swarovski Crystals. Beaded beads are made using Right Angle Weave.


Light Amethyst
Kumihimo braid using tigertail, hand made gold tone clasp, fresh water pearls and Swarovski Crystals. Beaded beads made using Right Angle Weave.

So there they all are. Aline loves them although I might have to rework the Blue one so it fits the personality of who it's going to better. If I do change it I'll show you what I do. I really enjoyed the challenge of using the same beads in so many different ways.

Sunday, June 21, 2009

For the Love of Paper......

I have always loved paper and stationery. I have always made my own cards and loved wrapping presents. Kim is a woman after my own heart. She sells paper products she designs herself. Her work is simple and effective and wonderfully personal. I recommend taking a look at her store. Kim's blog is a comfortable insight into her life as a WAHM (work at home mum). She looks at her discoveries and everyday events. My personal favourite is the this picture of her dog. 
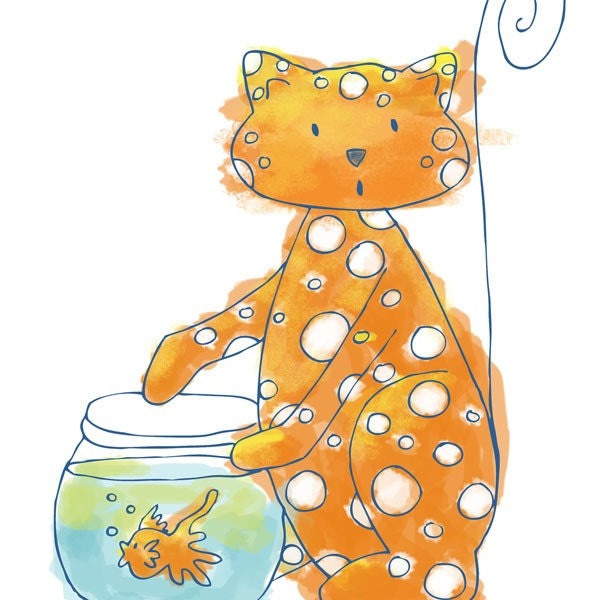
I guess he just reminds me of one of my soft toys. It also comes at the end of her story about the day at the chocolate shop - another subject close to my heart.

Kim's posts are personal and show her delight in life. And this post shows the shows the importance of working hand in hand with local businesses.

Monday, May 18, 2009

Etsy

I have a shop on etsy but haven't updated it for ages. With moving and house shopping and many other reasons and excuses I haven't kept it up. I popped along to Jenny's blog today and she is very involved in etsy. There are challenges she is entering that I didn't know existed and she participates in a great way that helps promote her own work but also the work of others. The last challenge she was in was a beadweaving challenge and the works on display are wonderful. I love seed beading work. Go and check out her blog. Hopefully soon she will tell us how she went in the challenge.

Monday, April 13, 2009

Braiding - Two

Because I was experimenting with different materials that I had around the house I also tried the braiding with different wire combinations. Some I used wire only and for other braids I combined wire with different widths of satin cords. The picture below shows exactly the same satin chord used with the same wire/cord width and show the different effect that is created. The wire, once braided doesn't stretch or give in anyway and so gives a completely different effect. While I'm not so keen on the gold wire, the textural result is quite fun.

This next picture shows other experiments also. The top 3 use only craft wire. I'd like to do more of these and make some bangles out of them. Once curved they sit really comfortably on the wrist. They work better with the thicker gauge wire, I discovered.

The pale braids are some of my favourites - satin cord with tigertail. I most certainly with be making lots of those to hang my pendants from. And then the black one is stain cord with leather.

Monday, March 02, 2009

Braiding - One

My house is up for sale and it is difficult to sit down and bead and craft. It always makes a mess and I need the house ready at the drop of a hat. What I started just before this though was braiding. Japanese braiding or 'Kumihimo'. I have had tremendous fun using bits and bobs I've had around the place, experimenting with textures and widths.

I have only really tried with two basic patterns. I like ribbons included. Especially if they have metallic thread on the edges as it gives just a little bit of glam. I'm going to have to invest in some more ribbon I think. The thinner ribbon is better. It fits into the weave neater.

When I bought my Kumihimo disc I also bought some micro macrame string and some texture ribbons. I think the textured ribbons give a beautifully soft finish but if used in necklaces I think they might stretch too much.

Monday, December 08, 2008

What a Wonderful way....

I was just over reading the forums over at Party Plan and one of the members (Esther) described her business like this. I thought is was a wonderful way to describe it.


Your Business is your seed, you decide how much food and water and sunlight you will give to it every day.

It will either flourish or wilt and eventually die.

It is in your hands.

Friday, October 17, 2008

making Jewellery. My Process Part 3

I still am really happy each time I look at how the turquoise set finally turned out. Here is what I did with the red beads.
This piece took hardly any time at all compared to the turquoise one. Because the original beads were from another necklace/bracelet set, some of the beads had single holes, some double. I wanted to use this in the design. I was able to do this by making the focus of the necklace two pieces of wire and creating a frame.


The frame was given strength by the beads that slipped over both wires and had interest because of the different shapes and placements of the beads. I used the basket wire weave to fill in the gaps.

The earrings have their shape because of the same reason. The bottom two beads have a single hole while the top red bead is a double hole. I love how they hang. I love the cross effect created. I love the colour combination. This pinky red looks so much better without the turquoise.

Again I plaited the strand so that the necklace can be worn long. My friend loves it. I showed her this one in much the same way as before. This time, immediately she saw it she lunged for to grab with and cried out as she moved, 'Oh I love it'.

I tell you, it feels great to have a reaction like that.

Monday, September 08, 2008

Making Jewellery. My Process Part 2

As the beads sat in their bags I mulled over the dilemma. What to do? At the time I was finding out more about wire work and was experimenting with basket weave. I thought I'd give it a go. In the end it worked. It took a lot of fiddling though. At first it sat wrong, the stone kept moving even when taped down. I didn't wrap evenly on the top and bottom. I added the beads at the bottom in a way that didn't work. I found that the frame wires sat a little better once I'd hit them with a hammer. It gradually took shape. It took, I think, 5 goes to get it right. It still wasn't quite centred but with some loops to finish of the wire it looked as though it had all been planned.
Once the pendant was done I had to work out what to do with the other beads. I hung it on tiger tail but it looked funny. The wire is so thin and the pendant so big. I ended up taking 4 wires and plaiting them together. My friend wanted it long so I took it into work and measured it on her.

Then I started on the earrings. At least now I had a design to match. Hopefully these would go easily. It took 4 tries to get the proper design of the frame wires. It is all one wire and it had to allow the bead to be seen while still holding it firmly in place. Finally, success. Cheers all round. Now just one more earring. Well, making it turn out the same size as the first was a challenge in itself. Three tries later and it was close enough.

Thank goodness I was using craft wire not gold!!

I'm so pleased with the way it turned out. It was so different to what my friend was expecting it took a bit of convincing but the lovely ladies at work oohed and aahed so much over it she was eventually convinced.


Here is the finished set. Oh yeah, I had some beads left over so I used them in the bangle. I love how it turned out.

Monday, August 04, 2008

Making Jewellery. My Process Part 1

About a month ago I finally finished a couple of sets for a friend of mine. She talked to me at the beginning of the year, could I help her. Her sister had given her a necklace and bracelet set. She loved some of the beads but the necklace was plain and the bracelet cut off her circulation.

I asked her if she had anything particular. She said that she didn't really but, 'could I emphasise the green more than the pink and could she have a necklace, bracelet and earrings please'. So with those instructions I set to work.

Well, setting to work for me means mulling. I set all the beads out. If I was to make a three piece set pretty much only the green beads, that meant I'd need to add things. Luckily, I'd just purchased some cheap turquoise cabs that were just the colour.

To keep costs down, I decided I'd use brass wire. I wrapped the large turquoise cab and started to string... and got completely stuck.

After some months of mulling, I took the beads with me to a bead day with friends and asked for help. This is the idea that they came up with.


Armed with these new ideas, knowing I could use the read and yellow beads for a completely different set, I happily went home.

I wrapped the small cabs and went about putting them with the beads for earrings. I put one together... and hated it. Perhaps I could work the necklace itself. That didn't go well either.

In the end I cut all the wires, put the turquoise set in one bag and the red beads in another and set them aside.

Thursday, July 17, 2008

Setting Goals

I was reading through the posts on a new business help forum today called T.R.A.I.N. If you are interested you can read the entire post over at the forum by following the link. What I liked about the post were the goals that Henry has worked out for himself. I know goals are important. I also know I should be looking at them every day. I do struggle with this. I liked the simple way these are set out. Hopefully you find them helpful also.

I also listed 11 Goals to Reach on my first page to read and see every time I opened my Journal. Those goals are,

1. Visualize your future and goals for business daily.

2. Write down goals to reach and how to do it successfully.

3. Write down ALL weaknesses to the business and how to overcome it.

4. Accept and believe compliments and give up excuses and "I can'ts."

5. Change all "I can'ts" to "How can I do it?"

6. Start acting "as if" the business existed today!

7. Ask and answer all "what if" questions you may face and put in journal, (including personal fears & how to answer them).

8. Accept fear as just a feeling, and do it anyway.

9. Write out all ways you can be a service to others.

10. Write down thoughts about your business in journal often.

11. Look for ways to volunteer help to others regularly.

Saturday, May 10, 2008

If You Fall Down Seven Times Get Up Eight

In the spirit of learning through quotes of wise people, here is a quote for today.
Every Failure is a Step Closer to Success
People who try to do something and fail.
Are infinitely better than those who try to do nothing and succeed.
Experiencing failure is inevitable on your journey to be successful.
Every defeat is merely an installment to victory.
You'll find that the number of times your succeed is in direct proportion
To the number of times you fail and keep trying.
You won't be judged by the number of times you fail
But by the number of times you succeed.
Failure is nothing but education,
Nothing but the first step to something better.
You can't be a winner and be afraid to lose.

Max Steingart


It has taken me a little while to get myself moving over the last two weeks. I prepared for my home show. I invited other artists to show their wares, invite those they knew. I printed flyers, sent email invites, talked to people. Over two days, around 12 people showed up. The four of us made a total of $510 in sales. Admittedly, two of the four of us sold nothing and I sold the most but still, I count it as a failure.

So I have licked my wounds and now I am back. Failure is but the first step to something better...provided that I learn the lessons. And so I will work at ways to make the next one better. I will again begin focusing on my OurGV business. I move onward and upward. Most of the teaching in todays OurGV training was about not giving up. Taking the falls, leaping towards the possibility of failures so that the successes can start to come.

And if you have run successful home shows then leave me a comment and tell why they worked.

Monday, April 14, 2008

Two Things that Made My Heart Soar Today

I love the moments that come when something beautiful comes along. That happened to me twice today.

This first was a quote. I don't know who originally said it. If you know, then let me know and I'll acknowledge them here.

'To get something you never had, you have to do something you never did.'

When God takes something from your grasp, He's not punishing you, but merely opening your hands to receive something better. Concentrate on this sentence... 'The will of God will never take you where the Grace of God will not protect you.'

The second was a link to this video. As a musician I learnt. As a person I got chills.

Monday, March 31, 2008

I've Been Reviewed!!

The people at Etsy DUST blog have reviewed my etsy site. They said I was great. Go check it out.